What tools do I need to stencil?
When you're just getting started it can be confusing to know what tools you may need to create certain technique. Hopefully you have a few already in your cake decorating stash and won't need to get too many extras! I've highlighted the bare minimums you need to do each stencil technique, and then some extras. Most of the items are available in the shop and can be found here: Lustre Dust Tools | Royal Icing Tools | Airbrush Tools
For those that are not, I have created an Amazon Storefront as a reference to list the cake decorating tools, books and baking bits that I personally use. It is an affiliate page, which means I earn a small commission off of sales on it, but you are under no obligation to buy & can simply use it as a reference.

Essential tools are marked with *. For information on how to stencil cupcake toppers with lustre dusts, please see the How to Stencil section.
To purchase tools that are available on our website, you can go directly to that section of the shop here: Stencil Tools for Using with Lustre Dust.
1. Cranked palette knife
To lift your topper off the board.
2. Non-stick rolling pin and board *
For rolling out on. You can also use a non-stick silicone mat
Three sizes for domed, flat and small toppers
Keep your lustre dusts easily accessable and neat
Available in a wide variety of brands and colours
An essential tool for this technique
7. Cupcake Spacers
Roll out your sugarpaste to the same thickness every time
For creating domed cupcake toppers
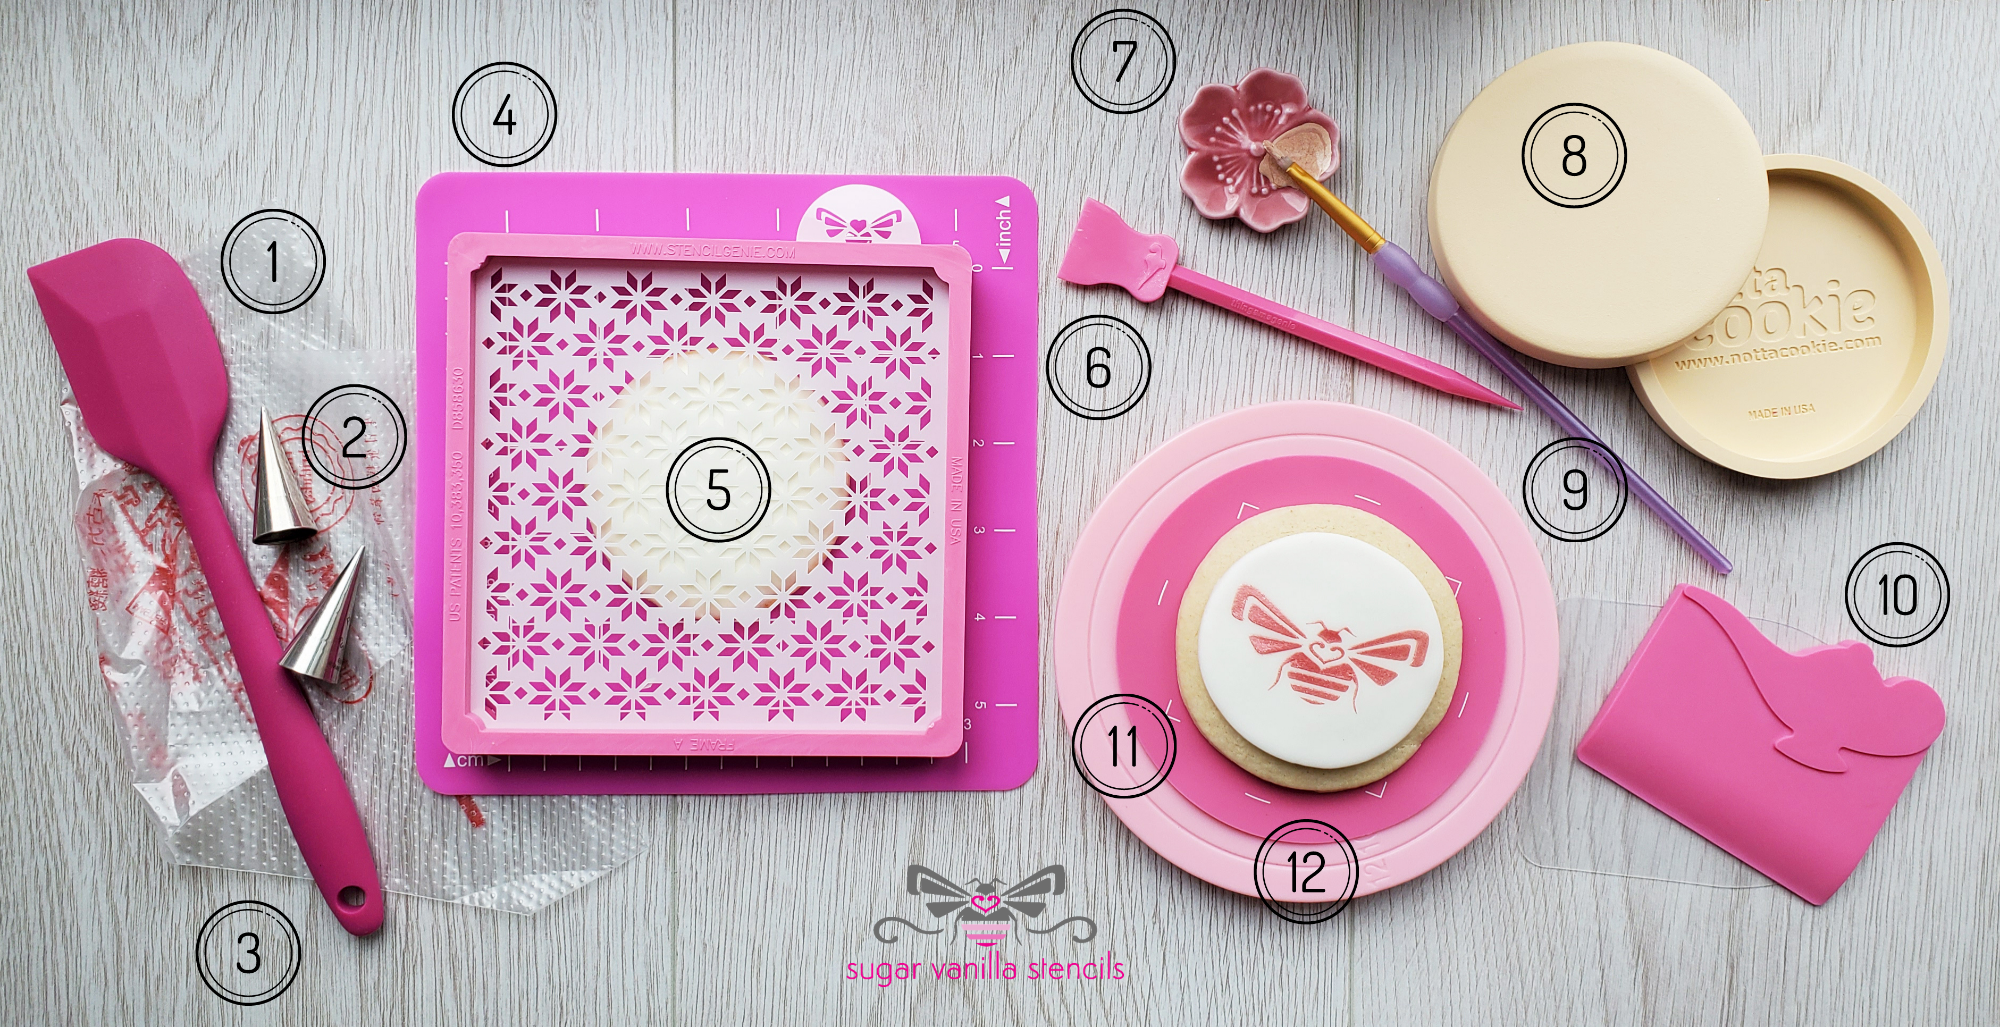
Essential tools are marked with *. For For information on how to stencil with royal icing, please see the How to Stencil section.
To purchase tools that are available on our website, you can go directly to that section of the shop here: Stencil Tools for Using with Royal Icing.
1. Tipless icing bag
For use without a piping tip. Can use a normal icing bag with tips
2. Icing tips
Can be used for flooding, applying icing onto the stencil
3. Small spatula
Used to mix royal icing and to apply to stencil
4. Non-stick mat
Used to line up the stencil holder and keep cookie in place
5. Stencil Genie *
Stencil holder to hold stencil in place on the cookie
6. Thingamagenie *
Flat edge can be used to scrap small stencil areas
7. Edible paint holder
If using edible paint use a small palette rather than from the bottle
8. Notta Cookie
Practise your designs before committing to real cookies
9. Paintbrush
To paint with but can also be used to correct any icing mistakes
10. Icing scraper *
An icing scraper is essential! I recommend the Icing Genie
11. Turntable
Turn the cookie without touching it when working on finer details
12. Non-stick mat
A non-stick mat helps prevent the cookie from moving out of place
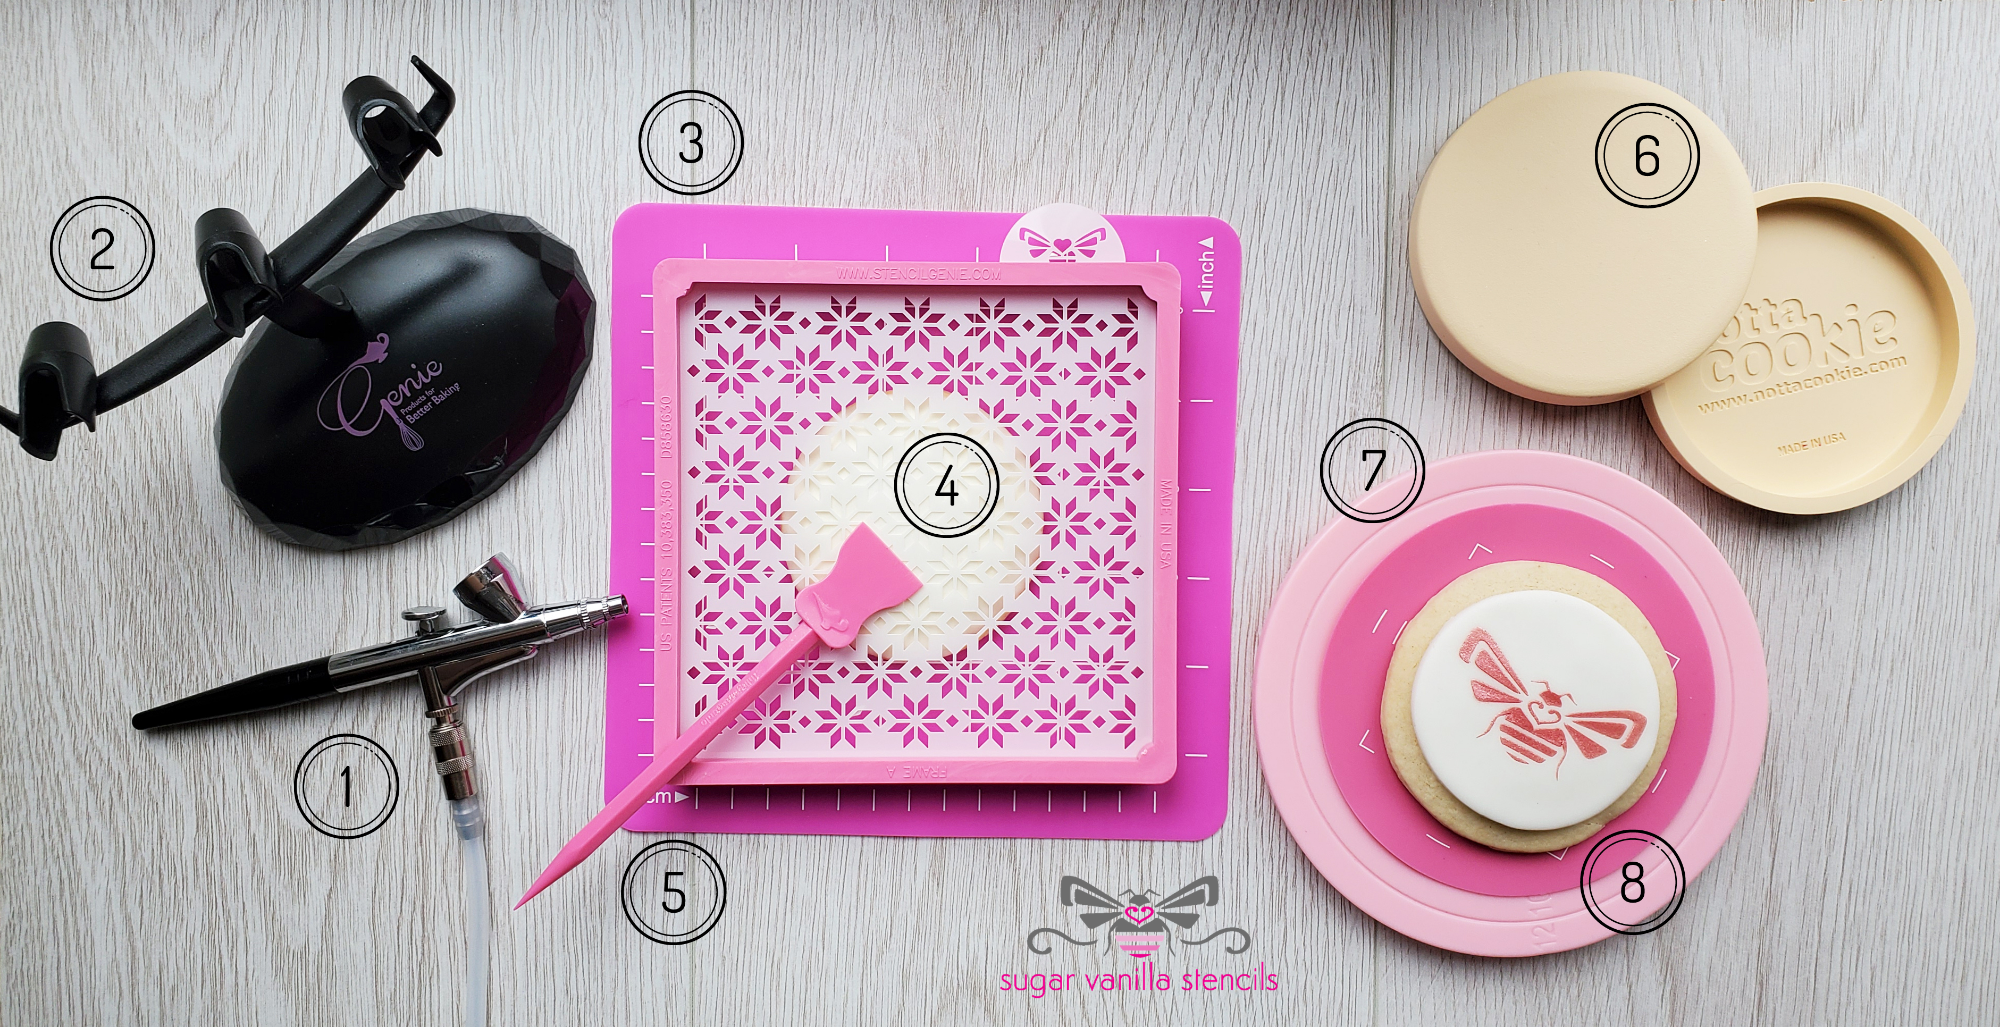
Essential tools are marked with *. For information on how to stencil with an airbrush, please see the How to Stencil section.
To purchase tools that are available on our website, you can go directly to that section of the shop here: Stencil Tools for Using with an Aibrush.
1. An airbush *
Probably the most important thing for this technique!
2. Airbush pen holder
For when you are working with multiple pens and colours
3. Non-stick mat
Used to line up the stencil holder and keep the cookie in place
4. Stencil Genie *
Stencil holder to hold the stencil in place on the cookie
5. Thingamagenie *
Use to hold parts of the stencil down on intricate designs
6. Notta Cookie
Practise your designs before committing to real cookies
7. Turntable
Turn the cookie without touching it when working on finer details
8. Non-stick mat
A non-stick mat helps prevent the cookie from moving out of place
Have a question?
Hopefully I've covered the basics for you in the sections above, but if you still have any questions, please do get in touch via the form on the Stencil 101 page