
How to Stencil
This page is a work in progress - I'll be updating videos to this page during the next few weeks. In the meantime I do hope the information below is helpful.
Stencil Size
When starting a project you will need work out what size stencil will work best to get the results you want. Will the stencil cover the area you need it to? Will the design be big enough?
There are two size measurements to look at: the actual stencil size and the size of the design. All our stencils are sized by type. Cupcake stencils are 90mm (3.45") square and can be used to create different types of cupcake toppers, from small to domed. Cookie stencils are 140mm (5.5") square and are designed to fit into the Stencil Genie stencil holder. Cake stencils are available in various sizes and the correct one for you will depend on the size of your cake.
Don't worry about using a cookie stencil for a cupcake, or a cake stencil for a cookie. A stencil is a stencil, the names are just size guidelines. All our stencils have the measurements of the stencil and the design itself in both metric and imperial measurements in the product description. And if you can't find a stencil design that's the right size - get in touch, we can resize any of our designs for you.
Simple Stencil Rules
- Always ensure that your stencil is stable and not likely to slip or move when using it. If it's not secure you can end up with a smudged design. You can use a stencil holder if you need to.
- Clean the stencil between uses and when necessary, even if it's just a simple wipe. This ensures that you don't transfer any mess from one stencil design to another.
- Be gentle brushing, sponging or wiping over any design elements that could lift or bend. Once the stencil is bent it can be difficult to flatten it again.
- Our stencils are designed for use on food but can be used for crafting. If you do use them for crafting please remember that you cannot then use them on food.
- Wash by hand and dry flat on a teatowel.
Different Stencil Techniques - for cupcakes, cookies, cakes and more -
Click on the + for more information on the different stencilling techniques
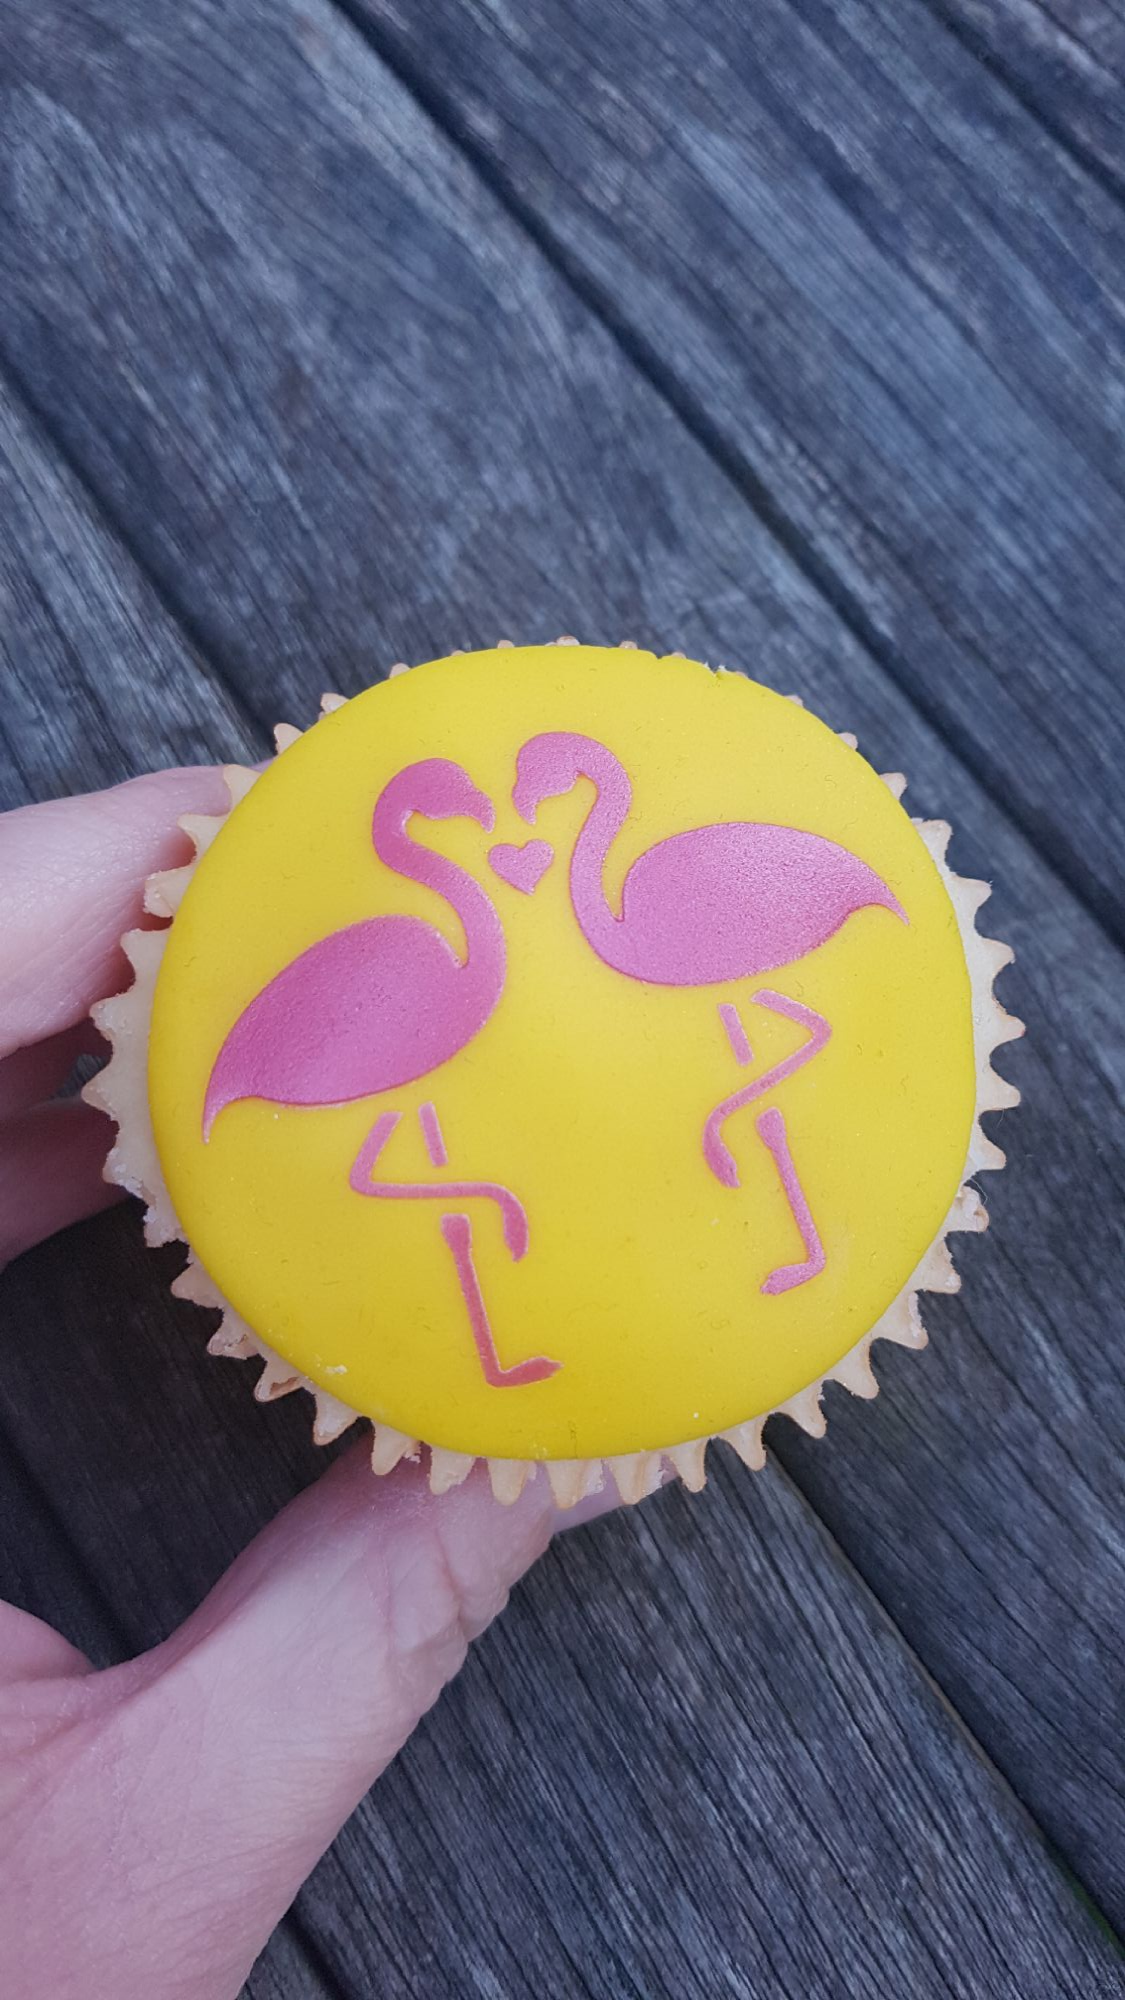
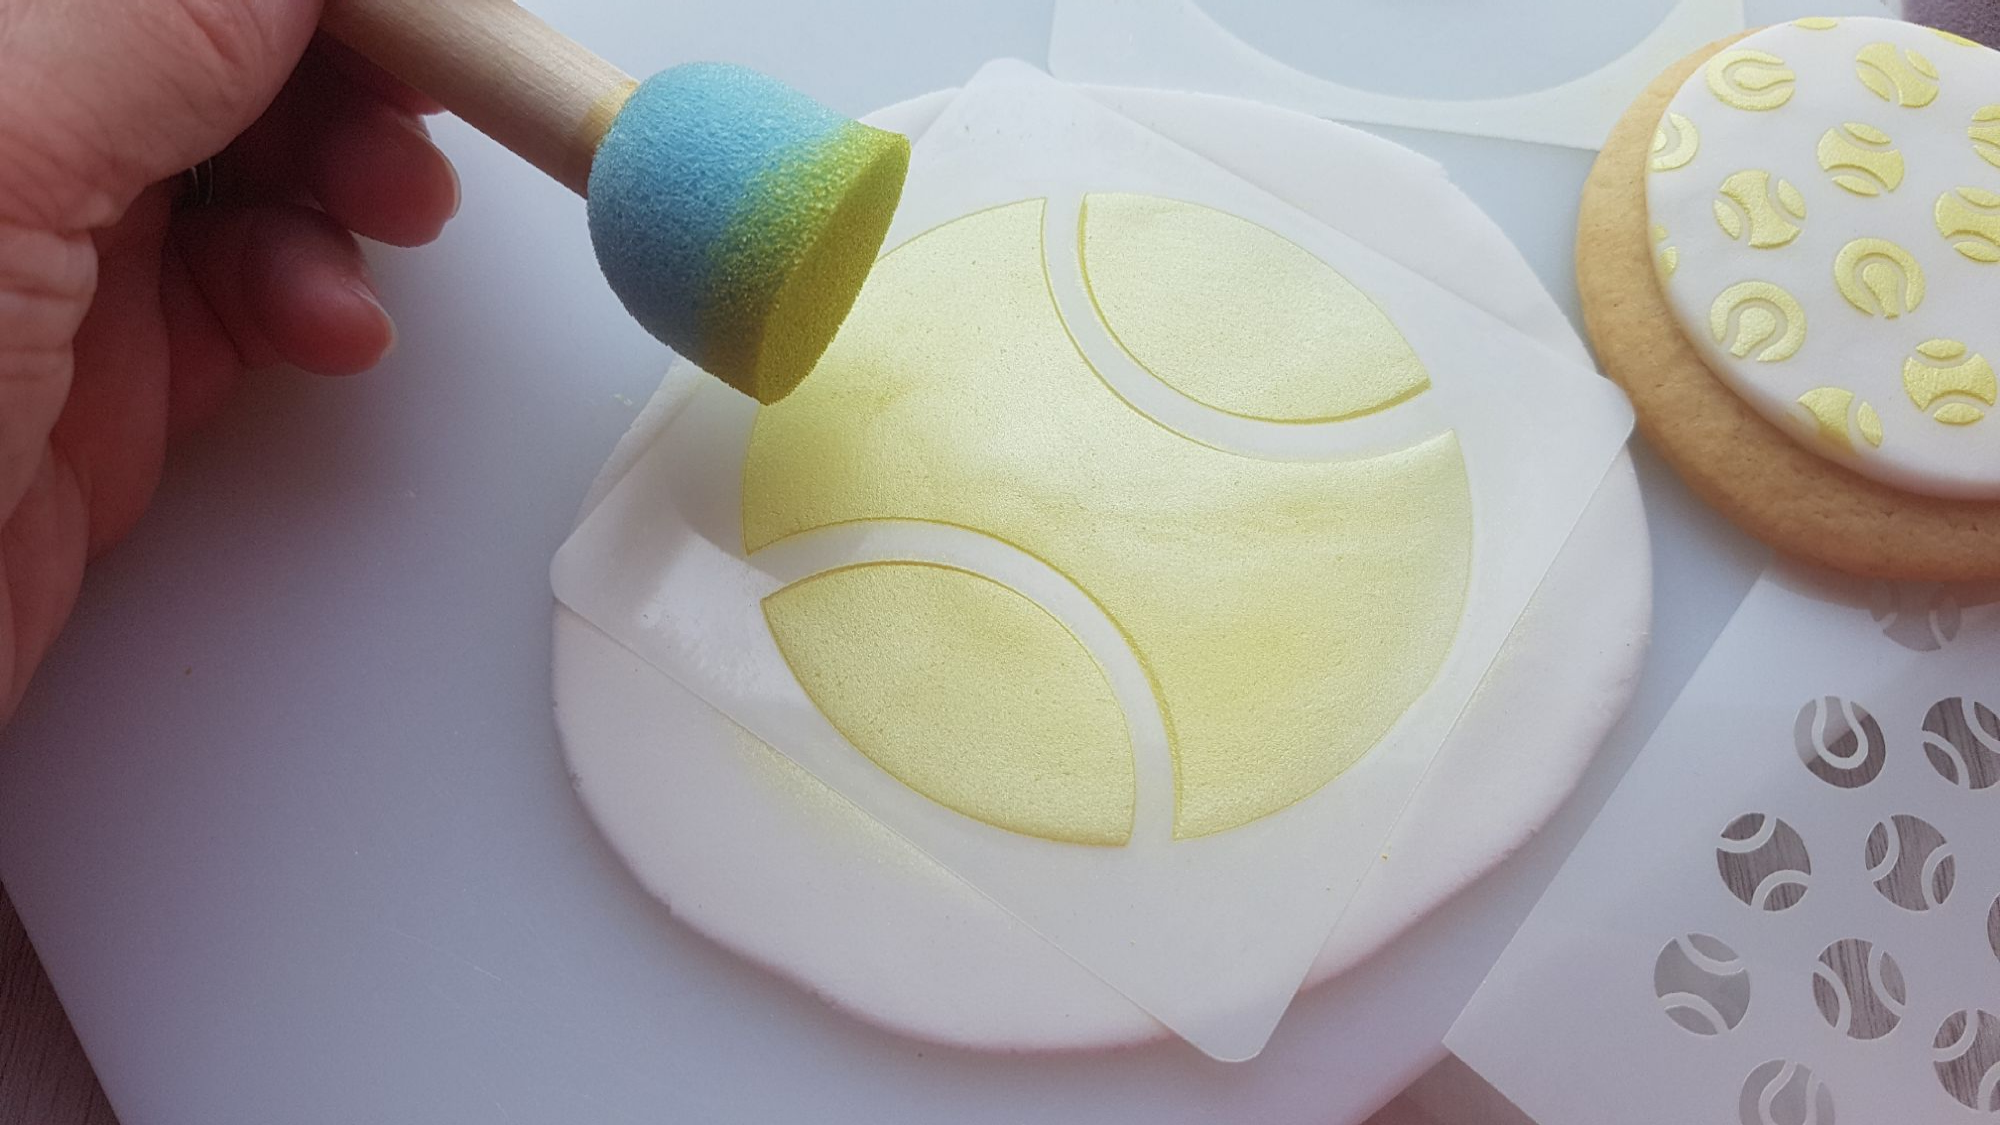
The Dry Stencil Technique - using lustre dusts to stencil (the quickest and easiest way!)
This is my absolute favourite way to stencil and the technique you will see me use the most. This technique only works on sugarpaste / fondant (and flower paste and marzipan). It will not work on royal icing.
You will need:
- A stencil
- A stencil sponge
- Some lustre dusts
- Sugarpaste / Fondant / Ready to Roll Icing
- A palette (for the dust) and a non-stick rolling board and rolling pin
Instructions:
- Roll out your sugarpaste until about 3mm thick
- Place your stencil on top and roll over once or twice. The stencil and sugarpaste need to be flat so make sure there are no lumps and bumps. Do not over roll your stencil, it will just push the sugarpaste up and out of the stencil design.
- Put some lustre dust in your palette and then use your stencil sponge to pick up a little bit of lustre dust. You can always add more.
- In gentle circular motions cover the stencil design with the dust. You can build it up. If you are using different coloured dusts always start with the lightest dust first.
- Once finished, gently left the corner of the stencil up and pull the stencil up off the sugarpaste.
- Cut to size with cutter and either place on your cupcake or leave to dry flat or on a sponge dome.
Note: keep an eye on the lustre dust. This is why a palette is recommended and to build it up slowly. If it gets on your rolling pin or on the bottom of a stencil it will transfer to your next sugarpaste topper, potentially messing it up. If necessary, wipe down or wash.
Cookie decorating - stencilling with royal icing onto royal icing
If you prefer to decorate your cookies with sugarpaste, please see the dry stencil technique section above.
You will need:
- A royal iced cookie that is dry and set (there are lots of youtube videos on different ways to royal ice / flood a cookie. I would recommend watching them if you have not done this before).
- A stencil
- A stencil holder (I recommend the Stencil Genie)
- An icing scraper
- Royal icing - either in an icing bag or in a bowl (up to you!)
Instructions:
- Place your stencil in your stencil holder and place over your cookie.
- Check the stencil is sitting nice and flush against the cookie. If not, you may need to either use a thicker frame on your stencil holder, or place something under the edges to make it slightly higher
- There are three ways you can place the royal icing. Which ever way you choose you will need to scrap the icing off
- Pipe icing directly onto the stencil, above the design, and scrap towards you
- Use a palette knife and smear the icing all over the design, then scrap the excess away
- Pipe the icing onto the scraper and then scrap it over the design
- Before lifting the stencil off make sure you're happy with it, you can't put it back! This would also be the point at which I may use a lustre spray on the design to add a bit of sparkle
- Lift the stencil off and put the cookie to one side to let the royal icing air dry.
Using an airbrush to stencil
There are a number of different airbrushes available on the market, all at different price points. The one that I use and you can see in my videos is an older version Dinky Doodle Airbrush. I would really recommend watching as many YouTube videos as you can of how to use an airbrush as the instructions below assume that you are familiar with using one.
Note: when stencilling on royal icing or chocolate it needs to be set. Ideally sugarpaste and buttercream should be left to firm a little before airbrushing.
Which airbrush paints to use :
- Only use EDIBLE airbrush paints
- Water based paints - suitable for sugarpaste, royal icing, buttercream, flower paste
- Ethanoyl based paints - suitable for sugarpaste, royal icing, buttercream, flower paste and chocolate (ethanoyl is an alcohol and may not be suitable for dietary/religious reasons)
- Brands widely available in the UK: Sugarflair, Spectrum Flow, Magic Colours, PME and Fractal Colours.
Airbrushing onto any medium - sugarpaste, royal icing, chocolate, etc
- Make sure your stencil is secure and held in place over your cupcake topper, cookie, chocolate, ideally using a stencil holder. You will need your hands free to airbrush. If you are working on a cake then the stencil will need to be secured to the cake (see the "Stencilling on a cake - how to secure your stencil in place" section on how to secure the stencil).
- Once you have paint ready to go in the airbrush and your stencil is in place, turn the airbrush on and gently build up the colour layers over the stencil. The paint may bead on the stencil plastic so you really want to be focusing on the open design part of the stencil.
- Airbrushing gives you more control when using different colours on different parts of the stencil design and you can also build up the colours.
- When done, turn off the airbrush, lift the stencil up, and allow your creation to dry!
Stencilling royal icing or ganache onto sugarpaste / fondant (cupcake toppers and cookies)
Royal icing onto sugarpaste / fondant is commonly used when stencilling onto a cake, but you can also use it for cupcakes and cookies. You can also use this same technique with chocolate ganache (or buttercream).
For how to stencil onto a cake please see the "Stencilling on a cake" sections below.
You will need:
- A stencil
- Sugarpaste / fondant / ready to roll icing
- Royal icing or chocolate ganache
- A non-stick rolling board and rolling pin
- An icing scraper
Instructions:
- Roll out your sugarpaste until about 3mm thick
- Place your stencil on top but do not roll over it (this is different to using lustre dust where you would roll over the stencil). For this technique the royal icing or ganache needs to fill the stencil design, not the sugarpaste.
- There are three ways you can place the royal icing. Which ever way you choose, you will need to scrap the icing off
- Pipe icing above the design and scrap towards you
- Use a palette knife and smear the icing all over the design, then scrap the excess away
- Pipe the icing onto the scraper and then scrap it over the design
- For ganache you can use a palette knife to cover the design and then scrap the excess away.
- You should scrap away just enough to see the design but not so much that you've scraped it away completely.
- As you do not usually use a stencil holder for this technique you may need to hold the stencil in place with your hand when you scrap away the excess so that it doesn't move and smudge your design. If your sugarpaste is freshly kneaded and rolled out the stencil should stick to the sugarpaste naturally due to the fat in it but it may not hold as you scrap the icing away.
- Before lifting the stencil up you can spray the royal icing or ganache with dry lustre dust from a pump or use an airbrush.
- Once you've lifted the stencil away, cut the sugarpaste to size.
- If using ROYAL ICING - I would recommend placing your topper on a cupcake or cookie immediately before the icing has a chance to start to harden and potentially crack. You can leave it to harden but remember your sugarpaste will harden as well. You can always royal ice directly onto a sugarpaste / fondant covered cookie.
- If using GANACHE - You can also place immediately but it is unlikely to crack like royal icing would.
Painting your design with edible paint on....
- Royal icing - only paint once it has dried
- Ganache - you can paint it before you lift the stencil up as long as it's set a bit
- Buttercream - is difficult as you can flatten the design or break it with a brush. Would recommend letting it crust first and being very gentle
Stencilling on a cake - what to use
There are several ways to stencil on a cake and it depends on what the cake is covered with - buttercream, ganache, modeling chocolate or sugarpaste / fondant. The list below is not exclusive and you can mix and match stencil techniques and what you're using. It's trial and error as to what suits your decorating style best, but generally those listed below are tried and tested methods.
What can you use to stencil on to different types of covered cakes:
- Sugarpaste / fondant covered cake
- Royal icing
- Airbrush
- Ganache
- Buttercream covered cake
- Buttercream
- Airbrush
- Ganache covered cake
- Ganache
- Airbrush
- Royal icing covered cake
- Royal icing
- Airbrush
What about lustre dusts and edible paint?
I would recommend using the lustre dusts only when panelling a cake with sugarpaste. As you create the panels from rolled out sugarpaste you can stencil it while it is flat. You can then cut to size and panel onto the side of the cake. It possible to stencil directly onto the side of a sugarpaste covered cake but the sugarpaste must still be soft and this means you can mark the cake, plus the dust can fall down the side of the cake marking it. It can be a bit of messy.
Edible paints work best if there is another medium underneath, like royal icing or ganache, where you paint it either before or after the stencil is removed. If painting directly onto the stencil, care needs to be taken that the paint does not drip down behind the stencil, meaning a smudged or indistinct pattern.
Stencilling on a cake - how to secure your stencil in place
Stencilling directly onto the side of cake requires a bit of practise. I always recommend using a dummy cake before attempting it for the first time on a covered cake. It's a good way to work out how you're going to stencil a cake beforehand, so placing your stencil on a dummy cake to see how the pattern will work will give you a good idea of how you will work. Find the method that works best for you.
1. Pinning the stencil in place
This is honestly my preferred method. Stencils come in all shapes and sizes and the one thing they all have in common is that you can put a pin through the open design part of the stencil. It will also work for all types of covered cakes.
Now a lot of bakers do not like the idea of pins - if you lose one in the cake and a customer eats it, very bad. Very bad indeed. You can mitigate this risk by using the "Four In and Four Out" method. I always use four pins. Never more, never less. My pins are sterilised metal pins with a brightly coloured secured bead on the top. I know if I've put four pins in, then four pins better come out.
So place your stencil against the side of your cake, make sure it's where you want it and is lying flush against the cake. Place your first pin in the bottom left in an open part of the design, ideally as far left and down as you can go and up against the plastic of the stencil. Then repeat in the other three corners. You want your stencil nice and tight against the cake and not moving about.
Start spreading your royal icing (or ganache, buttercream) from the centre of the stencil, working towards the edges. Make sure to go around the pinned parts. Remove any excess icing but don't start scraping yet.
Right handed: hold the left side stencil with your left hand and scrap away the royal icing from left to right, leave a bit around the pins on the left. On the right hand side of the stencil, still holding the stencil in place with your left hand, remove the pins and scrap over them. This fills the pin holes with icing and there will be no marks in your cake.
Left handed: hold the right side stencil with your right hand and scrap away the royal icing from right to left, leave a bit around the pins on the right. On the left hand side of the stencil, still holding the stencil in place with your right hand, remove the pins and scrap over them. This fills the pin holes with icing and there will be no marks in your cake.
Now do the other side. You may find on the side you have finished first, the stencil lifts up. That's fine, leave it until you're finished. You will need to hold onto the stencil when you pull the last pin out so you can control of it. Still holding on, pull the other side of the stencil up and away, until removing it completely.
It's best to practice this on a dummy cake the first few times as lifting the stencil off can be awkward if you have your hands in the wrong place.
2. Using parchment paper or baking paper as a collar around the cake
Another method is to tape a piece of parchment paper or baking paper to one edge of the stencil, ideally using non-toxic low-tack tape, and then take the paper around the cake and tape to the other side of the stencil. This holds the stencil in front and up against the cake. The paper should be as high as your stencil or as high as your cake to avoid making marks, particularly if using sugarpaste or buttercream.
You then apply your icing to the stencil, scrape away and remove the stencil.
This is a really simple method and one that works. One thing to be aware of is that you will need to hold the stencil in place with your hand as it can still move around the cake when you scrap icing away.
3. Putting tape through slits or holes on the stencil and tying it to the cake
I don't use this method, nor recommend it. Our stencils do not have the slits or holes in them to do this . The reason I don't like using this method is that most tapes are not food contact safe and by going through, around and under the edge of the stencil, it lifts it up slightly and can mean your design is messy on the edges. The tape can also cut into your cake and leave a mark going around it. The paper method (number two above) is a better way.
4. Panelling
This method is where you stencil onto rolled out sugarpaste / fondant, cut to size and then apply to a crumb coated cake. The stencil is usually applied while the sugarpaste is flat, though you can stencil onto a panelled cake but in that instance you would just use one of the methods listed above.
How to stencil a cake board
Stencilling a cake board can help create some beautiful cupcake platters or an interesting board for your cake to sit on.
You will need:
- A cake board
- Sugarpaste / fondant
- Trex (white vegetable fat) or cooled boiled water
- A rolling pin
- A sharp knife
- A stencil
- Lustre dusts
- Stencil sponge
- Palette
Instructions:
- Knead and roll out your sugarpaste to slightly larger than the size of your cake board
- Rub your cake board with Trex or brush with cooled boiled water
- Place your rolled out sugarpaste on the board and smooth it out, making sure there are no air bubbles underneath
- Centre your stencil in the middle of the board (or where you want the pattern to be)
- Using your hand rub the middle of the stencil onto the board. Avoid the edges if your stencil is smaller than your board as it can mark the sugarpaste. Your sugarpaste needs to be freshly kneaded and still soft for this to work
- Gently rub dry lustre dust over the stencil using your stencil sponge. You can build the colour up gradually
- Left the stencil off and make sure it's all still centred. If you need to you can still move the sugarpaste (carefully!)
- Smooth out any marks that may have been left on the sugarpaste
- Trim the edges of the board and leave to harden
- You can prepare a board way in advance, just keep it in a cardboard box and away from dust.
TOP TIP: You can also stencil using royal icing. Ideally wait for the sugarpaste to harden before though. Just place the stencil on top, hold in place, spread royal icing over the design and then scrap it off.
Can I stencil on chocolate?
Yes you can!
You can either airbrush onto chocolate using ethanoyl based airbrush colours or you can stencil with ganache, melted chocolate, candy melts or royal icing. Lustre dusts will not work as there is nothing for them to stick to and luste sprays, both pump and aerosol, will give you an indistinct pattern.
What else can I stencil on?
Pretty much anything!
I have stencilled on cakesicles, chocolate covered oreos, scones, bread, pancakes, chocolate bars and more. The stencil is a tool that allows you to experiment and try new things.
Have fun!
Have a question?
Hopefully I've covered the basics for you in the sections above, but if you still have any questions, please do get in touch via the form on the Stencil 101 page.